Showing posts with label Jewish. Show all posts

Monday, 25 April 2011

The Ultimate Salt-Beef Sandwich


I could quite easily write a blog just about sandwiches.  From a Classic Club to a Banh Mi, a Cucumber Sandwich to a Spanish Omelette Bocadillo, there are endless fantastic variations just waiting to be recreated.  But my latest obsession has been a perfect Salt-beef Sandwich.  I have been reading a lot about The Rubens Sandwich and I wanted to give it a go.  So last week I put a fantastically cheap piece, of the somewhat neglected cut, brisket into Brine and now it is now bubbling away gently on the stove, as I write. 

The first meal will be a simple supper, as Nigel Slater would say, of poached salt-beef with just the accompaniment of some boiled New Potatoes, Carrots and Celery from the pot and some horseradish or mustard. In fact I think I have some beetroot in the fridge left, from my Riverford Vegetable Box so I might knock up some Chrain - Horseradish and Beetroot Relish.

I have made this Salt-beef recipe (or corned beef as they call it in Ireland and across the pond) many times before and it is from the fabulous “Charcuterie, The Craft of Salting, Smoking and Curing” by Michael Rehlman and Brian Polcyn. 

I am very keen to invest in a Smoker for my back garden.  Ever since giving up smoking a few years ago, I have been constantly drawn towards products which are smoked in some sort of desperate, nostalgic recreation of this lost pastime of my youth.  Instead of sitting on the deck in my back garden smoking, I have images of sitting feeding exotic woodchips into my smoker before tucking into home-smoked Hickory Mackerel and Maple Cured Smoked Bacon.  In the meantime, I am still saving up for this expensive piece of kit.  Well, at least the ones I have my eye on are.  It’s a tossup between the Weber 47cm Smokey Mountain Cooker or a ProQ Frontier at the moment, and if anyone out there has any advice into helping me make up my mind, your comment would be very much appreciated.

But back to my sandwich. There are many questionable stories into the history of The Reuben’s sandwich which is basically melted Swiss cheese, sauerkraut, Thousand Island or Russian dressing and salt-beef, in toasted rye bread.  But I wanted to know how it held up to my all time favourite of salt-beef, half/half mustard (half American - sweet, and half English - for the kick) and loads of pickle cucumbers, also on Rye.  

I made up my Reuben’s, and I have to say it was damn fine.  The only thing I wasn't sure about is the Sauerkraut but I reckon that is because it is shop bought and not home made.  I tried my own favourite again.  That was damn fine too.  And then I had an idea.  The ultimate Salt-beef sandwich.  Just put everything in it - so I did, and it was fantastic!  Here it is.  The first ever recipe for "The Melman" -The Ultimate Salt-beef Sandwich. 

I felt I needed to work on the Sauerkraut. The best I had managed to  find was Krakus, in my local polski sklep but it wasn't great. Sauerkraut is cabbage with has been fermented and also, more importantly in times before refrigeration, preserved. It is immensely popular in many European countries including Germany and Poland but also Alsace, where the name comes from, and France where it appears in the famous dish, Choucrout Garni. This is a substantial meal with the addition of sausages and potatoes. The very thing to sustain you through the cold winter months.

The fermentation process in the cabbage produces Lactic Acid Bacteria and therefore is Bioactive and probiotic like those expensive little drinks such as Yakult. Interestingly there are versions of recipes based on fermented cabbage from all round the world. Kimchi from Korea, Tsukemono from Japan, Suan Cai from China and Atchara from The Filipinos.

The recipe I have used is in the very same book I was using for the salt-beef. I have always been slightly put off by the thought of fermenting barrels of cabbage out-side my back door, but this recipe sounded fairly straightforward, so I decided to give it a go. It is one week into its two week fermentation and looking good. I will let you know how it turns out.


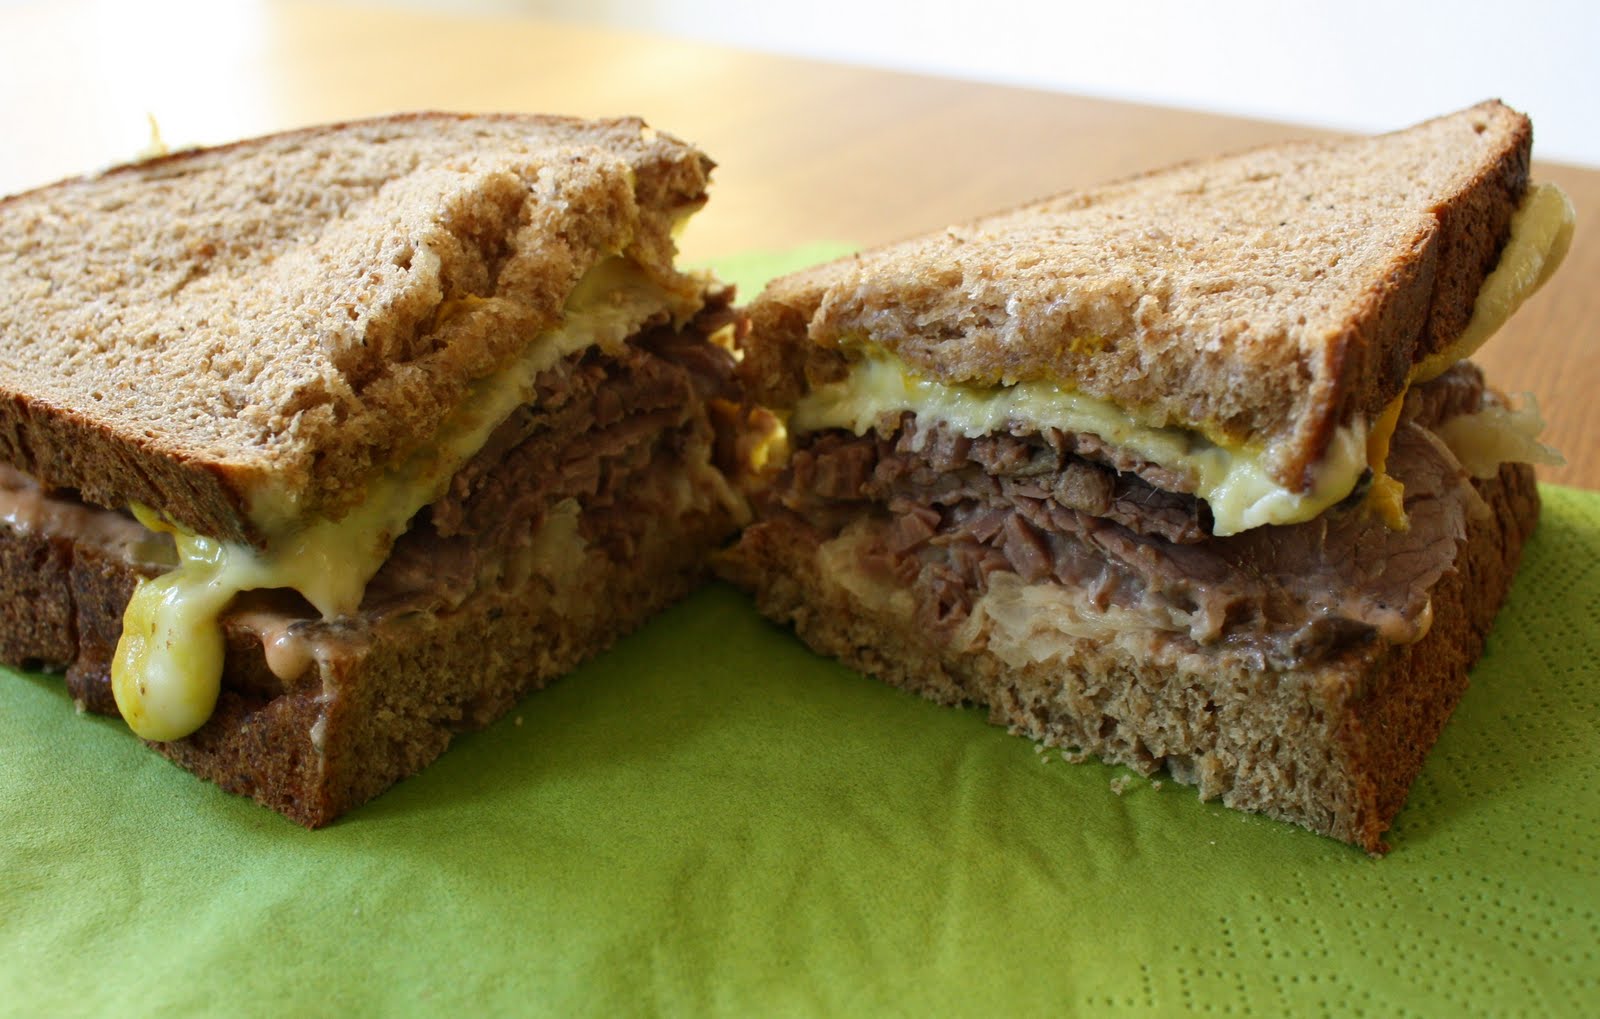
The Melman (The Ultimate Salt-beef Sandwich)


Rye Bread - Cucumber Pickle Juice Rye loaf
Salt Beef
Pickle Cucumbers (Sweet and Sour)
English Mustard
American Mustard (French's Classic Yellow)
Swiss Cheese
Sauerkraut
Thousand island dressing


Butter one side of your slices of bread and place the slices buttered-side down on a large piece of wax paper on a flat surface. Spread with half/half of the mustards. Top with a slice of Swiss cheese. Cover in slices of dill pickle and then slices of salt-beef. Using paper towels, squeeze out excess moisture from the sauerkraut. Top with sauerkraut. Add another layer of salt-beef and a second slice of Swiss cheese to each sandwich. Coat the second piece of bread with thousand island and place dressing side down on top of the cheese. Butter the side facing out.


Preheat a griddle or frying pan to medium heat. Cook the sandwiches on one side until the bread is golden brown. Use a spatula to carefully flip the sandwiches over and finish cooking on the second side. Cut the sandwiches in half before serving.


Sauerkraut

The Brine - 4 litres water and 3/4 cup plus 2 tablespoons / 200g Kosher salt
1 green cabbage, about 3lbs / 1.5 kg, shredded or thinly sliced.

Combine the water and salt in a small pot and bring to a simmer, stirring to dissolve the salt. Remove from the heat and let cool, then chill. Combine the cabbage and brine in nonreactive container. Cover the cabbage with a piece of cheesecloth or a clean kitchen towel. Weight the cabbage and cloth down with a plate, pressing down so that the cabbage is completely submerged. Cover loosely with cling film and set in a cool place for 2 weeks (no hotter than 70 to 75 degrees F. / 21 to 23 degrees C. or non beneficial bacteria can begin to thrive.) Drain the cabbage, reserving the brining liquid; the cabbage should have a pleasant sour-salty flavour and although its green colour will have paled, it should still be crunchy. Strain the braising liquid into a pot and cover and refrigerate the cabbage. Bring the brining liquid to a boil. Remove from the heat and let cool to room temperature, them chill. Pour enough of the cold brine over the sauerkraut to cover it completely; discard the extra brine. Store, covered in the refrigerator for up to 3 weeks.

Thousand Island Dressing
Mayonnaise
Tomato Ketchup (a good quality one if possible)
Lemon Juice
Tabasco
The mix is up to you.

Tuesday, 19 April 2011

Chicken Soup and Other Stories


Every Passover there is great competition over the Kneidlach - the Matzo Balls. “Grandma so and so’s are too heavy!”, “last year they were too small!” Aunty Frumpchas are like bullets! So on and so forth. Recipes are discussed in hushed tones and there is mounting anxiety as the day grows nearer, as to the outcome of this year’s specimens.
Recipes are passed down from mother to daughter like a rite of passage, an honoured, secret knowledge that comes with womanhood. So when my time came to finally be trusted with the secret of my Mother’s, an accomplished cook, fluffy little Matzo Balls, I was filled with great anticipation and took care that I should listen to her every word. “Telma’s Kneidl”, she confided in me. “That is my secret”. What! The box of instant mix that you can find in a large Tesco’s kosher section. Add an egg! That is it!
But you know what? They work. So I kind of accepted that this is how things were going to be. And many years later, when I had children, and wanted to restore them to health from any ailments with “Jewish Penicillin” and nurture them with nourishing little matzo ball dumplings, I too turned to the packet variety. That is until I looked at the ingredients. Hydrogenated palm oil? The very stuff that is resulting in the destruction of rainforest and wiping out the Orang-utans and Monosodium glutamate? I don’t think so. I was determined to set about making my own. And it turned out to be dead simple. The first recipe I tried was brilliant and I have never looked back. No instant, processed, re-hydrated Matzo balls for my kids!
As for the chicken soup. I like to embellish mine with a little sprig or two or fresh coriander. The fragrant lemonyness of the herb brings the soup alive. Clearly, there are chicken soup recipes from nearly every country in the world but for Passover I try to stick to the version of my forefathers. I am not about to start putting lemongrass, ginger or chilli into a soup containing Kneidlach but I feel this very small nod in the direction of Thailand is an acceptable step in evolution. Instant Matzo Balls are not.
1 cup matzo meal (Rakusens’s Medium is good)
4 large eggs
1/2 teaspoon kosher salt
2 tablespoons melted schmaltz (the fat that you skim off the top of your chicken stock)
2 teaspoons baking powder
1/2 teaspoon freshly ground pepper (optional)

Measure and mix dry ingredients into a bowl. Individually break the eggs into a clear glass, discarding any with blood spots, and then pour into a second bowl. Add schmaltz to the eggs and stir gently with a fork until the yolks are broken and the fat just mixed. Pour egg mixture into the dry mixture and gently mix with the fork. DO NOT OVER MIX. Treat it like a muffin mixture; if you over mix they will be tough. Place in the fridge for 1 hour. Put a couple of ladles of your chicken soup into a separate saucepan. Season and bring to the boil. Reduce to a very gentle boil. Remove a teaspoon full of the batter at a time and using wet hands roll into small balls. Drop into the hot soup. Keep the balls fairly small as they will swell hugely. When all the balls are in the stock leave it to simmer until all they float to the top. Keep the temperature low at a rolling simmer for 5-10 minutes or so and your matzo balls will be ready. DO NOT STIR AT ANY TIME. Remove carefully and serve in a bowl with the remainder of your hot soup.
   
Chicken Soup

Personally I get Chicken Bones free from my butcher. I ask for as many will fit into my largest pan. A lot of recipes use a whole chicken, but now a days that you don’t usually get given the giblets and neck, there is really not enough flavour in one chicken and it can get costly, especially when I only ever recommend using free-range chicken. I use up lots of vegetables in my stock as well – shallots or spring onions, the stalks from the parsley or thyme, the end of the leeks and bits and pieces in the fridge that need using up, so the list below is only a suggestion.
Chicken Bones, as many as you can fit in your largest pan
2 Onions, Roughly chopped
2 Leeks or the green ends of the leeks
2 Carrots, sliced
6 stalks of Celery, roughly chopped
Parsley Stalks / Thyme Stalks
A Handful of Peppercorns
Several Fresh Bay leaves
A few extra carrots, leeks and celery for serving
A handful of coriander
Put the chicken bones into your largest saucepan. Add the vegetables and cover with water. Place the pot over a high heat and bring the water to the boil. Skim off the foam as it accumulates. When it is boiling, reduce the heat and simmer for 2-3 hours over a low heat. Strain the stock, discarding the bones and vegetables. Bring back to the boil and skim off the fat (schmaltz) for your Matzo Balls. Add some extra vegetables to serve in your soup. Season lightly with salt and freshly ground black pepper and reduce until the vegetables are cooked and the soup tastes good. Adjust seasoning. Serve with Matzo Balls and Coriander.


Thursday, 7 April 2011

A Loaf or Three


I have been constantly feeling bad, ever since “Lamenting Lost Lebanese” that I did not include a Pitta Recipe.  What good are all those delicious dips without a warm piece of fresh pitta bread to dunk into them.  So here it is, and if you have never made pitta before you will be amazed how it actually works.  It puffs up, just as it should, and sinks again, to leave a perfect pocket, to be stuffed full of kebab or falafel, dollops of hummus, heaps of salad and lashings of chilli sauce. 
About 20 years ago I was lucky enough to be sent by The River CafĂ©, for a stage at Chez Panisse in Berkley, San Francisco, so I came very familiar with the sourdough concept.  And I can still remember the joy of sitting in Fisherman’s Wharf, looking out over the boats and digging into a hollowed-out sourdough loaf, filled to the brim with hot, creamy, smoky clam chowder.  In fact I can feel another post coming on! 
Then, many years later, I had the pleasure of working at Gail Stephens, Baker and Spice (sadly no more) and got used to eating fantastic Potato and Rosemary Bread or Pain au Lavain daily.  Thankfully The Bread Factory, originally Gail Force, lives on.  I own a well thumbed copy of Baker and Spice “Baking with Passion, by Dan Lepard but I am ashamed to say that my life now allows little time for Biga acida and wild yeasts. 

So, when looking for a suitable rye bread recipe for my Ultimate Salt-beef sandwich,  I was thrilled to find a fantastic “Cucumber Pickle Juice Rye Loaf” by the very same, fabulous (as Gail would say) Dan Lepard in his book “The Handmade Loaf”.  The genius of using the juice out of the pickle cucumber jar, utilizing something which used to go down the drain, as I finish yet another jar of dill pickles, is brilliant.  But even more so, is that the juice acts as the souring and therefore replaces the need of a “sourdough” starter.  I have to admit that on recommendation I added a little more yeast and I still only got one decent sized loaf but it had great texture and tasted delicious.  My brisket in still in the brine but it is ready on Saturday and I hope to share the results with you very soon.

Finally, my own tried and trusted “Challah” recipe, which I have made time and time again.  I am not a great baker but I love going to the Village Bakery, still hanging on in there, sandwiched between “Paul” and “Le Pain de Quotidien”, and buying my fresh yeast. I love the fact that it costs 30p an ounce, in an age where nothing seems to cost any less than a fiver.  I love the smell of freshly baked bread filling the house on a Friday night and there is no better way to unite the whole family, and start the weekend than the taste of that slightly sweet, deliciously soft bread, and the obligatory  glass or two of wine.  Good Shobbas!

Cucumber Pickle Juice Rye loaf
by Dan Lepard

200g toasted rye flour [40%] (see below)
300g strong white flour [60%]
3/4 tsp fine sea salt
350g cucumber pickle juice at 20ÂşC (70%)
1 1/4 tsp fresh yeast, crumbled (1%) (I added a little extra)
10g [2 good sprigs) fresh dill, chopped (2%)

To toast the rye flour, preheat the oven to 200'C. Spread the
rye flour in a thin layer over a baking sheet, and bake for 15 minutes, or until the
flour has turned a light tannish brown. Remove from the oven and allow to cool.
Combine the flours, and mix with the salt. In another bowl whisk the pickle juice
with the yeast and dill. Mix this liquid and the flour together with your hands,
squeezing it through your fingertips. When roughly combined, cover the bowl and
leave it for 10 minutes. Tip the dough out on to a lightly oiled (with corn or olive
oil) work-surface and knead gently for 10-15 seconds. Return the dough to the
bowl, leave for a further 10 minutes, then knead once more for 10-15 seconds.
Return the dough to the bowl, leave for 10 minutes again, then knead one final
time for 10-15 seconds.

Give the dough a turn and repeat after 30 minutes and 1 hour.
Original recipe says “Divide the dough into two equal pieces, and shape each into a round” (but I didn’t, I just made one).  Place both (one) on a flour-dusted baking sheet, leaving a space between for the loaves to grow.  Cover and leave for 1 hour, or until doubled in size.
Preheat the oven to 210"C/'110'F/gas mark 6%.Cut a slash across the centre of
each loaf. Bake in the centre of the oven for 55 minutes, until the loaves are a
good rich brown colour and, when tapped on the bottom, sound hollow. Leave to
cool on a wire rack.

Pitta Bread

Makes 12 soft, yeasty little flat breads. Serve with a Greek salad or dips

375g white plain flour
1 ½ tsp fine-ground sea salt
1 ½ tsp white sugar
1 ½ tsp fast-action dry yeast
250 ml tepid water
1 tbsp olive oil

Mix the flour, salt, sugar and yeast together in a bowl. Stir in the warm water and olive oil and mix until it comes together as a dough.  Add extra flour if sticky, extra water if dry. Knead on a lightly floured surface for 10 min until smooth. Place in a large, clean bowl, cover with plastic wrap and leave to rise for 2 hours in a warm place. Punch the dough down, and knead for 1 minute. Cut the dough into 12 pieces, shape into balls, and set aside for 10 min. Heat the oven to 200C/Gas 6. Roll each ball into a fine, flat oval. Bake on a lightly floured tray for 6 to 7 min, until puffy, soft and pale. Wrap in a slightly damp tea towel until cool. To serve, place in a hot, dry pan for a minute or two until warm.


Challah
This is a big batch of bread. You don’t have to make all of it.  It is about 6 loaves but  I like to freeze the ones I don’t need, once they are proved.  This way, I can remove one from the freezer, defrost, plait and bake at a later date, for perfect instant, fresh warm bread.

2oz Fresh Yeast
3 ½  cups warm water
¾ cup sugar
1 cup oil
6 eggs beaten
1 ½ tablespoons salt
13-14 cups flour
1 egg, beaten to glaze
Poppy seeds or sesame seeds to garnish
In a large mixing bowl combine yeast and 1 tablespoon sugar in the warm water.  Set aside for 5 to 10 minutes.  Once the yeast starts to bubble add the remaining sugar and half of the flour.  Mix well.  Add the beaten eggs and oil and mix well.  Knead in the remaining flour and salt, slowly until the dough is light and easy to knead.  Knead well for a further 10 minutes.  Place dough in an oiled bowl.  Cover with oiled clingfilm.  Leave to rise in a warm spot for 1 ½ hours.  Punch down and separate Challah (with a blessing).

Turn dough onto a lightly floured surface and divide into 6 sections.  Divide each section into three.  Roll each into a long sausage shape about as long as your fingertips to your elbow.  Join at one end and plait until you reach the other end. Tuck under and place on a greased baking tray.  Allow to rise for 45 minutes.  Preheat oven to 170Âş-180 ÂşC.  Brush loaves with beaten egg and sprinkle with seeds.  Bake until golden brown, about 30 to 45 minutes. The loaf is cooked when taped on the base, it sounds hollow. Remove from tray and cool on a cooling tray.

It also makes the best toast.


Friday, 11 March 2011

A Taste of Winter Sunshine


All the Citrus fruit always seems to look its best at this time of year. Oranges and Grapefruits are in season and are all looking so juicy and tempting. Lots of beautiful pink grapefruits, blood oranges and now is the time to make marmalade, as servile oranges are around, but only for a short while. It really is cold outside at the moment and these fantastic fruits really are like a taste like a mouthful of sunshine, from the other side of the world. Although Lemons apparently don't have a season, they too always seem best in the winter. So I decided to make a batch of Preserved Lemons because I had a craving for Moroccan Lemon and Coriander Chicken.


My recipe for preserved lemons comes from Claudia Roden, in her fantastic book "Middle Eastern food". Every time I pick up that book I can't stop reading and find new and exciting recipes that I would love to try. But since we are on the subject of citrus, I thought I would share with you her fantastic, famous recipe for Orange and Almond Cake. This is a Sephardic recipe and one I often make for Passover, as it has no flour in it. It is really unique in its use of whole oranges which are boiled first and produces a cake which has more of a pudding consistency. It is delicious with a dollop of vanilla ice-cream.

My Moroccan Lemon and Coriander Chicken, (I won't call it a Tagine, since I did not cook it in one, although I really must invest in one soon), is a combination of other people recipes, which I have adapted over the years.  I use Ras-El-Hanout Spice Blend by Seasoned Pioneers which is an impressive combination of Galangal, Rosebuds, Black Pepper, Ginger, Cardamom, Nigella, Cayenne, Allspice, Lavender, Cinnamon, Cassia, Coriander, Mace, Nutmeg and Cloves.  I also particularly like the little re-sealable pouch it comes in, to keep it fresh. Top Marks!  I don't use any extra chilli but added extra black pepper to add a little kick.  I like to have this with simple plain Cous Cous maybe with a little fresh chopped coriander and a little finely chopped preserved lemon mixed through it. 


Preserved Lemons in Salt

You can add spices such as cinnamon sticks, bay leaves, coriander seeds, cloves, peppercorns, dried chilles, and cardamom pods if you like.


Ingredients


Lemons (Organic, un-waxed if possible)
Kosher salt or Natural Rock Salt
Large Kilner Jar


Scrub the lemons under running water with a stiff brush to remove any dirt and impurities. Starting at one end, cut the lemons in half lengthwise, but stop about 1/2 an inch before you reach the bottom. Repeat the cut perpendicularly so you have cut each lemon lengthwise in a "X" formation, but not all the way through; they should still be attached at the bottom, about 1/2 an inch. Liberally sprinkle salt on the inside of the lemons. Hold them open with your fingers and really get the salt inside them. It is a little bit like those fortune-teller origami toys kids make out of paper. Place each lemon in the jar, pushing down on them and squeezing them to release the juices. Keep adding Lemons until you absolutely cannot get any more in. The lemons should be completely submerged in juice. If they are not, top up with some extra lemon juice. Seal the jar.  Let the jar sit at room temperature. Every few days, turn the jar upside down and shake it to distribute the salt and liquids. The lemons will be ready in three weeks, or so, when the rinds have softened.


Moroccan Lemon and Coriander Chicken


Olive oil (or Argan oil if you have it)
One whole chicken jointed or 800g of chicken drumsticks
2 heaped teaspoons of Ras-el-Hanout or more to taste
Two onions, finely chopped
3 cloves of garlic, minced
One cup chicken broth (or water)
Large pinch of saffron
Two preserved lemons, chopped
One bunch coriander, finely chopped
Salt and freshly ground black pepper to taste


Heat the oil in a tagine. Fry the chicken until all sides begin to brown. Remove and add the onions.  Cook for 10 minutes until soft and just about to brown.  Add the garlic and the Ras-el-Hanout and a generous amount of salt and pepper.  Fry for a few minutes to release the spices. Add chicken broth, or water and the saffron and return the chicken . Bring briefly to boil. Reduce heat. Cover, but leave a crack for steam to escape. Simmer over low heat for thirty minutes or more. When the chicken is cooked, check the sauce.  There should not be too much liquid.  If necessary remove the chicken and reduce.  Add the preserved lemons and the Coriander. Add salt and adjust seasoning.


Orange and Almond Cake
2 large oranges
6 eggs, separated
250g caster sugar
250g ground almonds
1tsp baking powder
Place the clean, whole and unpeeled fruit in water to cover, and bring to the boil. Simmer for 1½ hours or until soft, adding more water when necessary. Drain the oranges, cut into quarters, discard any major pips, and whiz the rest, including peel, in the food-processor. Add the egg yolks and sugar into the food processor and continue to mix until completely smooth. Add the almonds, and baking powder. Mix for a minute more and  pour into a 23cm (9in) spring-form cake tin and bake for about an hour at 180C/Gas 4, until firm to the touch (cover with a loose sheet of foil if over-browning). Cool in the tin before removing.  You can also try making little "Madeleine’s" with the mix.  They worked really well.  Don't forget to butter your tin thoroughly. 


When I make a large cake I like to decorate it with these Candied Orange Slices.

Candied Orange Slices
Take an orange cut whole sliced as thin as possible. Set these aside. In a large, heavy skillet, bring 1.5 cups water and 1 cup of granulated white sugar to a boil... then add the orange slices. Let it boil for about 5-10 minutes, turning once or twice, then reduce the heat to medium and let it continue cooking for about 30 minutes turning occasionally. The liquid will thicken and become syrup. Reduce the heat until the oranges are at a low simmer... continue cooking and occasionally turning until the syrup is thick and the oranges are translucent but still intact. 
Remove from heat but let the orange slices remain in the pan as they cool for about 10 minutes... then remove to a sheet of wax paper to cool completely. The syrup remaining in the pan can be saved and used in other dishes... great fresh orange flavour for cakes and puddings.