Showing posts with label Indian. Show all posts

Tuesday, 24 September 2013

Plenty


Usually the necessity of having to work for a living is nothing but a distraction for getting on with my blog. Recently however, I have been doing recipe testing and photography for Riverford, for their soon to be launched "Recipe Boxes".This is a new craze sweeping the nation when you receive, delivered to your door, three easy to follow recipes plus all the ingredients to cook your evening meals. 

I have to admit that I wasn't overwhelmed by the idea until I put them to the test. I like to think I am not the sort of girl who is not short on ideas or creativity when putting together a dinner for two, but I cannot tell you how pleasant it is, just sometime to not have to think about it. To know that everything I need is there at home waiting for me, no shopping, no planning and what turned out to be an even greater plus is that even Hugh, the other half, can cook them too. For the first time in years he actually managed to cook dinner on his own, not once but twice in a week. He found the recipe cards easy to follow and what with the unavoidable convenience of having all the ingredients weighed out, to hand, managed to knock up dinner with practically no fuss at all!  And you would not believe how pleased he was with himself.

In the meantime I needed to deal with my latest allotment glut. Due to my failure to sew few and often, to stagger my crops and in my total over enthusiasm to grow anything at all, I now am reaping the excess crops to mirror my initial excess impatience. I failed to thin my crops sufficiently and I am weighed down with Fennel, Chard and Spinach, all ready at the same time.

Lucky for me, guess what recipes I have been testing this week. Being seasonal, the recipes I am testing exactly match what I am harvesting and these two recipes for Indian Spiced Spinach & Chickpeas and Fennel & Chard Gratin could not have been more perfect for using up my surplus vegetables.  Now I can start dealing with the tomatoes!


Indian Spiced Spinach & Chickpeas with Coconut & Coriander Rice
prep & cook 40 mins, 
serves 2
1 onion (150g)
1 garlic clove (5g)
piece of ginger (25g)
fresh coriander (20g)
20g butter
150g long grain white rice
1 x 400ml tin coconut milk
salt
oil for frying eg sunflower or vegetable
200g spinach (or change to 150g chard)
1 x 400g tin chickpeas
½ teaspoon brown mustard seeds (2g)
½ teaspoon ground cumin (2g)
½ teaspoon garam masala (2g)
¼ teaspoon chilli powder (1g)
¼ teaspoon turmeric (1g)
¼ teaspoon ground cinnamon (1g)
400g chopped tomatoes
1 lemon (150g)

Put the rice in a sieve and rinse well under the tap. Peel and chop the onion. Peel and finely chop the garlic. Peel the ginger and finely grate it. Wash the coriander leaves and leave them to dry. Melt the butter in a heavy-based saucepan. Add the rice and stir to coat the grains. Stir the coconut milk so it’s smooth and add to the rice with 150ml water. Season with a good pinch of salt. Bring to the boil, the lower the heat, cover and leave it cook on a bare simmer. Keep an eye on the pan, stirring it every now and then to stop it catching on the bottom. Add a little water or more of the coconut milk if it’s getting too dry. While the rice is cooking, heat 1 tablespoon of oil in a large saucepan. Add the onion and gently fry without colouring for 6 minutes. While the onion is cooking, rinse the chickpeas well and leave to drain. Wash the spinach and remove any tough stalks. Roughly chop the leaves. Add the garlic, ginger, mustard seeds, cumin, garam masala, chilli powder, turmeric and cinnamon to the onion. Fry gently for 1 minute. Add the chopped tomatoes and a good pinch of salt to the onion. Bring up to a simmer. After the tomatoes have been simmering for 10 minutes, remove the rice from the heat and leave to steam, still covered. Continue cooking the tomatoes for another 5 minutes. Finely chop the coriander leaves. Uncover the tomatoes and add the drained chickpeas and spinach. Stir together and simmer, uncovered, for 5 minutes. Taste and add more salt if needed. (It does look like a lot of spinach to start with, but it wilts down). Fluff up the rice with a fork. Squeeze in the juice from ½ the lemon and stir in the chopped coriander leaves. Serve with the chickpeas and spinach.


Fennel & Chard Gratin
prep & cook 45 mins
serves 2
2 fennel bulbs (500g)
olive Oil
salt & pepper
300g chard
2 garlic cloves
100ml white wine
1 whole nutmeg
125ml crème fraîche
fresh thyme
salt & pepper
25g wholemeal breadcrumbs
40g parmesan
1 lemon

Preheat the oven to 190C/180C fan assisted/gas mark 5. Put on a large pan of salted water to boil. While the oven is heating up, trim any large spiky tops of the fennel and remove any tough outer leaves. Cut the bulbs into thin wedges, still with the core intact to keep them together. If a few odd bits fall apart, don’t worry. If you have any feathery fronds on your fennel, keep those and add them when you stir in the cream. Heat 2 tablespoons of oil in a large pan. Add the fennel and cook it very slowly, stirring every now and then. It will take about 20 minutes, until it’s starting to caramelizeStrip the chard leaves from their stalks. Wash both, then chop the stalks very finely. Peel and finely chop or crush the garlic. Once the water is boiling, plunge the chard leaves in and boil for 3 minutes. Get a large bowl of cold water ready. Drain the leaves and plunge into the bowl to refresh, then drain again. When cool enough to handle, roughly chop the leaves. After about 20 minutes or so, when the fennel starts to look a golden brown colour, add the chard stalks and garlic. Cook, stirring, for 5 minutes. Add the wine and use a fine grater to grate a little of the nutmeg into the pan. Cook for 2 minutes. Stir in the cream, chard leaves and the thyme leaves. Season well with salt and pepper. Transfer to the baking/gratin dish. Put the breadcrumbs in a small bowl. Finely grate enough of the lemon zest over the bowl so you have approximately 1 teaspoon in there. Grate in the cheese too. Mix together then scatter over the fennel mixture. Transfer the dish to the oven (ideally keep the sweet potatoes on the same shelf but move them onto a lower shelf if you need to make room – you might just need to cook them a little longer) and bake for approximately 20-25 minutes, depending on your oven, until the gratin is golden on top.

Tuesday, 3 January 2012

A Cracking Curry


I am a little curried out at the moment.  My slow-cooker lends itself so happily to curries, that I think I might have almost overdosed recently and so when I saw that the Sweet Heat Challenge, over at  Food, Foot-ball and a Baby  this month, was "Lets Rock Indian", my first thought was actually, "Lets not."  But then I needed something really super-easy for dinner that I could chuck in the slow-cooker and forget and I remembered this really delicious chicken dish that I found in Anjum Anand's "Indian Food Made Easy" and I had been vowing to make again.  This is a very authentic, traditional curry which appears to derive from Kerala, in South West India where Black Peppercorns are thought to originate from. 

What I love about this recipe is that the main spice is black pepper and I often forget what a fantastic ingredient it is.  Although I throw it into almost everything I cook, I often overlook it's fragrant, almost floral perfume.  It has a hint of citrus and manages to be really over-powering but incredibly delicate at the same time. However, like any spice I suppose, black pepper looses its aroma really quickly and it seems the finer ground it is, the quicker it looses its fragrance.  So when the recipe says course ground, I recommend that the consistancy you are aiming for is more cracked than ground.  If you can't be bothered to hand crack your pepper then make sure you just pulse it in a coffee grinder, shaking it well between each pulse and do not over-grind.


Chicken with Peppercorns and Shredded Ginger
I have upped the ginger in this recipe, just because I love it and adapted it for the slow-cooker but you can just cook it on the stove top if you like.  Reduce the cooking time to two hours, as slow as possible.

Marinade
9 or 10 large cloves of garlic, peeled
20g fresh ginger, peeled
1 tsp garam masala
1 chicken stock cube, dissolved in 3 tbsp hot water

Other ingredients

1 kg chicken joints, skinned with all visable fat removed
3 tbsp vegetable oil
1 small onion, peeled and finely chopped
1-2 green chilli, to taste
20g fresh ginger, peeled and grated
1 tbsp ground coriander
salt, to taste
200ml water
1 tbsp coarse ground or crushed black peppercorns
1/2 tsp garam masala
2 tsp lemon juice
1 large handful of fresh chopped coriander

Blend the garlic, ginger, garam masala and stock together to make a paste with a hand blender. Then cover the chicken with it and leave in the fridge for at least an hour. I leave it over-night. Heat oil in pan and add the onion and sauté for 6-8 minutes until brown. Add the chilli, ginger, ground coriander and salt, leave to cook for about a minute. Add the chicken to the pan and brown each side. Pour in the water and pepper, bring to the boil then tip the whole lot into the slow-cooker.  Cook for 3 hours on slow.  Tip the whole lot into a large saucepan and turn up the heat and leave for 3-4 minutes to reduce the sauce. Stir in the garam masala, lemon juice and coriander and serve.


Monday, 2 January 2012

Never Dal


Life is never dull with my slow-cooker because there is always some new challenge to test its proficiency. Lately, I have been cooking a lot of dals with spectacular results.  Dal is far from dull. There are so many varieties, it is a little bid daunting. Moong dal (split yellow lentils), Toor dal (Yellow Pigeon peas), Chana Dal (split peeled chickpeas), Masoor Dal (Red Lentils) and Urad dal (split black lentils) and Mung dal (Mung beans) are just some of a long list. But once you have found your favourite it will become a staple in your diet. 


A dal is simply a dish made from any dried pulse, pea, bean or lentil which has been stripped on its outer hull and split. In fact the word dal means to split. Particularly popular in Southern India where the diet is vegetarian, they are a fantastic source of protein as well as being high in fibre which helps lower cholesterol.  They contain practically no fat and are high in folate and magnesium, Iron and B vitamins.

I have finished my dal with a Chaunk or to use the more recognisable, Punjabi word Tarka, hence the familiar Tarka Dal.  It is very common to finish your curry with a flavoured or tempered oil of some sort and you can add all sorts of spices and flavours.  I use Ghee as a base but you can use oil and add cumin seeds, black mustard seeds, fennel seeds, fresh green chilli, dried red chilli, fenugreek seeds, asafoetida, curry leaves, onion or garlic.  The dal recipe that I give below is so full of flavour that I simply garnished it with just my favourite, fried garlic, which I love.


After the onslaught of meat over Christmas, this is just what I am craving and wonderful way to start a happy and healthy New Year.  


Channa Dal
I have cooked this in the slow-cooker but you can cook it on the stove top just as well.
1 cup yellow split peas (Channa Dal)
1/4 cup vegetable oil

1 medium onion, finely chopped (about 1 1/2 cups)
1 large knob of fresh ginger, peeled and chopped
2 teaspoon cumin
1 teaspoon ground coriander
1/2 teaspoon cayenne
1 teaspoon salt 
2 cups water
5 large garlic cloves, thinly sliced
small bunch of fresh coriander, finely chopped

Rinse the dal. Heat the oil in a large saucepan over a medium heat. When the oil is hot add the onion and ginger and lightly fry until golden brown. Add the spices and briefly fry. Add the water and salt and bring to the boil.  Tip into the slow cooker and cook on high for 4 hours or low for 6 hours.  If you do not have a slow-cooker, cook very slowly on the stove top for a couple of hours.  When meltingly tender, add the chopped coriander.  In a little saucepan put the garlic just covered with vegetable oil.  Heat over a medium heat until the garlic is golden brown.  Remove immediately and spoon straight over the dal.  Do not leave the garlic in the saucepan for long as it will carry on cooking and may burn.

Sunday, 23 October 2011

What's in a name?


I am sure you wouldn't remember but one of my favourite advertising campaigns ever, was when "Mr Dog" changed it's name to "Caesar".  Mr Dog was a dog food for "small dogs" and not a brand that I was familiar with, since I have never had a small dog. I don't even think many small dog owners were particularly familiar with the brand either, since they probably fed their dogs on dog food which was suitable for all dogs, regardless of size.  So to have an advertising campaign for a dog food, you had never heard of, changing it's name, just seemed bizarre.  Why bother?  Was this the brain child of some top advertising company?   Did they think that re-naming a dog food "Caesar" was somehow going to catapult this product from obscurity into the best-selling dog food list? And after the initial "Why?" which sprang to mind every time they ran this advert, came an even more strong sentiment of "So what? Who cares? So what if Mr Dog is now called Caesar?". 

So when I tell you that, as you may or probably more likely may not have noticed, that my blog has changed name, as a result of a complete crisis at sometime around 3.00am in the middle of the night a few day ago, when I decided somewhat over-dramatically, as one does at that time of night, that Urban Ethnic cooking could not go on any more,  I do expect you to exclaim - who cares?  Well I do!  Urban ethnic cooking was just a bit pretentious and long winded for me and I am much happier now to be witting under a somewhat less profound and ostentatious identity.  And, so why Checky's Kitchen? - well, my nickname is Checky and I spend most of my life in the kitchen!   

So, without no more to-do, this weeks blog.... I  have been making a lot of Samosas recently.  They are just perfect as a snack and I thought they might even be nice to serve up for friends on bomb fire night.  I have made them with sweet potato, pumpkin and butternut squash but I do think that the recipe below works best.  I have to admit that I have been using ready made pastry which you can buy from all good Asian shops.  You will find it in the freezer and it may well be called Spring Roll Pastry, which is the same thing.  It comes in all sorts of sizes.  I usually buy the largest unless I am making canapés.  They are a good time saver to making your own pastry but not as good as the real thing so I will be giving the pastry a go next week and I will let you know how I get on.    

Finally another favourite snack at the moment, Crispy Roast Chickpeas.  You can have lot of fun with flavours and I much prefer them to the savoury flavoured pop-corn trend. Chickpeas are used in so many world cuisines I am actually finding it hard to find a country that doesn't eat them, although not everybody calls them the same thing.  Half the world knows them as Garbanzo Beans.  I can just hear it - "Chickpeas have changed their name to Garbanzo Beans". No, I won't start that again.


Vegetable Samosas

I have been giving a lot of thought to good fats recently and I am always questioning what is the best fat to use when cooking? It is a bit of a minefield out there of information at the moment. When I was growing up they told us butter was bad and margarine was best. Now there has been a complete reversal of opinion apart from, rather worryingly, the NHS.
This time it was a tossup between butter and coconut oil. Olive oil, my usual oil of choice, was not appropriate for samosas and I am very anti-vegetable oil. Health wise, butter and coconut oil are both in a similar boat. Once considered bad boys for their high content of saturated fat, (coconut oil has a much higher ration of saturated fat to butter) opinion seems to have changed. It is now considered that it is more important that they are low in omega 6, compared to vegetable oils which are very high. Our bodies need Omega 6 and Omega 3 but in equal ratios. Unfortunately, we are consuming far too much Omega 6 and not enough Omega 3 and vegetable oil is the main culprit. I now try and use primarily olive oil (high in omega 3), then butter (grass fed cows are also a good source of Omega 3) and finally coconut oil which contains no Omega 3, but neither does it contain Omega 6 and it can withstand high heats and adds a great flavour. Just use them in small amounts!
Taking all this into consideration, I decided to use Coconut oil for flavour BUT to bake my samosas instead of frying, to dramatically reduce the amount of oil I was using.
Finally, a note on frozen peas. I know I shouldn’t be telling all you seasonal veg enthusiasts, striving to eat fresh and local produce but to me, a samosa needs peas, even in the winter. But you can add any vegetables you like.
Vegetable Samosas
If cooking for the kids, omit the chilli. To avoid any bad fats, you might want to make your own pastry.
Coconut oil
400 g Maris Piper (or similar floury) potatoes
250 g cauliflower
125 g frozen peas
2 onions
2 cloves of garlic
Large knob of fresh ginger
1 fresh green chilli
2 teaspoon ground cumin
2 teaspoon garam masala
1 teaspoon ground cardamom seeds
½ a lemon, juice from
Bunch of fresh coriander
Sea salt and freshly ground black pepper
Peel and chop the potatoes into rough 1cm chunks. Break the cauliflower into similar sized florets as the potato. Add the potatoes to a large pan of salted water and bring to the boil. When nearly cooked, about 8 minutes, add the, adding the cauliflower and after a further 3 minutes add the peas. Bring back to the boil and cook for a final minute, then drain.
Meanwhile, peel and finely chop the onion. Peel the garlic and grate finely. Scrape the skin off the the ginger and finely grate. Deseed and finely chop the chilli. Heat some coconut oil in a large saucepan over a medium heat, and add the onion. Cook for 5 minutes or so until translucent and pale. Add the garlic, ginger and chilli and the spices and a teaspoon of salt and some freshly ground black pepper. Cook for a minute or two more and add the drained vegetables. Squeeze in the lemon juice and season to taste. Stir in the chopped coriander. Taste again. Add more spices or chilli to taste.
Preheat the oven to 180ºC/350ºF/gas 4. Lightly grease a large baking tray with oil.
Lay out the filo pastry and cut it in half lengthways. Take your first sheet and brush with some melted coconut oil. Spoon in the filling right down one end and fold over in triangular turns until you reach the other end. (Please see youtube link.) Finally brush with a little more coconut oil and place on a lined baking sheet. Bake in the oven for around 25-30 minutes, or until golden and piping hot through. Serve straightaway if possible.


Crispy Roasted Chickpeas

I'm really love these with all sorts of seasoning but anything with chilli lends itself particually well.  Check out Seasoned Pioneers for some of their spice mixes such as Caj
un or Creole Spice Blend Thai Seasoning Blend, Fahita Seasoning or Baharat or Ras-el-Hanout.  

One 15-ounce can chickpeas
2 tablespoons olive oil
Salt
Spice blend of your choice

Preheat oven to 180C.
Drain the can of chickpeas in a strainer and rinse with water for a few seconds to clean. Shake the strainer to rid of excess water. Lay paper towl on a baking sheet, and spread the chickpeas over. Use another paper towel to gently press and absorb the excess water. Roll around with the paper towel to also remove the thin skin where possible.
Drizzle the olive oil over the beans and coat. Roast for 30-40 minutes until the chickpeas are a deep golden brown and crunchy. Make sure that they do not burn.
Season with salt and spice blend whilst still warm.


Wednesday, 5 October 2011

An Indian Affair


I know I have been a bit Indian obsessed at the moment.  Maybe it was due to our unexpected little Indian Summer which was such a welcome surprise after a lousy, cold rainy summer.  I really did loose it though and suggested cooking an Indian themed feast for 70 in a local church hall.  It was for Riverford Organic and when they listed the produce that was most seasonal and was best right now to show - butternut squash, sweet potatoes, red peppers, aubergines, cauliflowers, cabbage, tomatoes and cucumbers - it just seemed fitting that this hint of coming autumn, would like a bit of warming spice. 

Anyway, due to a woefully ill-equipped church hall kitchen, not everything on the menu went entirely according to plan.  There were highs, possibly the Aloo Gobi and definitely the cardamom spiced rice pudding with ginger pears; and there were lows.  The onion bhaji and mixed vegetable pakoras which had been such a success in my trial runs were a positive disaster.  The huge vat of oil that I had erected on the stove, refused point plank to ever rise in temperature above a dismally 130 degrees.  For a crispy and light result I was aiming for around 200 degrees but it was not to be.  However, lets put that in the past and concentrate on the highs. 

The rice pudding is a combination of a classic recipe by the wonderful Simon Hopkinson and a recipe for Kheer, which is an Indian version of the same dish but spiced with cardamom and saffron and served with chopped almonds or pistachios.  It conjured up such a homely, warm and comforting image.  I made a batch and I couldn't wait to serve it to my kids.  I imaged physically and mentally nourishing them; so wrapped in love and soothed that nothing in the outside world could possible ever hurt them again.  They hated it!  My daughter literally spat it out.  My son tried to pretend he liked it just because he could see the total disappointment on my face.  But I could see he was lying.  Never mind.  I thought it was delicious. The image of soggy onion bhajis dissolved into a distant past, so I ate the whole damn lot.  Had I not have, it would have been equally delicious cold, the next day.


Aloo Gobi

1/4 cup vegetable oil
2 large onion, peeled and thinly sliced
1-2 small green chilli, chopped
Fresh ginger, peeled and grated
Fresh garlic, very finely chopped
2 teaspoons black mustard seeds
2 teaspoon salt or to taste
2 teaspoon ground cumin
2 teaspoons turmeric
2 teaspoons ground cardamom

3 large potatoes, peeled and cut into even small bite size pieces
1 large cauliflower, broken or cut into large bite size florets
1 bunch fresh coriander, roughly chopped

Heat vegetable oil in a large saucepan.  Add the onion and cook until they become creamy, golden, and translucent. Add the mustard seeds, cumin,  turmeric and salt. Continue to fry for a minute or two more but do not burn. Add chopped chillis (according to taste). Add ginger and garlic; mix thoroughly. Cook a few minutes more. Add potatoes plus a few tablespoons of water and stir well to ensure that they are coated with the curry sauce. Cover and allow to simmer for about 10 minutes.  Keep checking and stirring every now and then so that it does not catch and burn.  Add a little more water each time if necessary. When the potatoes are about half cooked, add the cauliflower, stir well and cover again.  Leave for a further 10 minutes of so until the potatoes and cauliflower are cooked.  Stir in the cardamom and coriander and adjust seasoning.  Try not to stir to much at this stage so as to keep the texture.  Allow to sit for a while to allow flavours to infuse.


Saffron and Cardamom Rice pudding

I have to admit that I really don’t like the skin that is formed when baking, which is probably Simon Hopkinson’s favourite bit, but it is not mine, so I have adapted this recipe to cook on the stove instead. This is delicious served cold.
40g/1½oz butter

100g/3½fl oz pudding rice (or Spanish paella rice)
75g/2½oz caster sugar
1 litre/1¾ pints full-fat milk
150ml/5fl oz double cream
Pinch salt
1 tsp vanilla extract or ½ vanilla pod, split lengthways
Pinch of Saffron
2 teaspoons of ground green cardamom
Large handful of chopped Pistachios

Melt the butter in a heavy-based casserole dish over a medium heat. Add the rice and stir to coat. Add the sugar, stirring until dissolved. Continue stirring until the rice swells and becomes sticky with sugar. Pour in the milk and keep stirring until no lumps remain. Add the cream and vanilla, salt, cardamom and saffron. Bring the mixture to a simmer. Once this is reached turn the heat right down and simmer gently until the mixture is reduced to about half. Turn off the heat. As the mixture cools it will become thicker in texture. Serve with pistachios sprinkled on top. Serve warm or chilled.

Monday, 12 September 2011

Something to look forward to...


The kids are back at school and I just have to face it.  Summer is over. Or as more accurately described it to Hugh, the other half, yesterday; "The months June, July and August - formally known as Summer."  I have heard some desperately trying to fool themselves that we may have a miraculous sunny September and that this is somehow going to make up for another wash-out summer.  Lets face it.  It's not going to happen.

I need something to cheer myself up between now and Christmas.  Something to look forward to.  I put this to Hugh, suggestively, even though I know that we are currently completely broke.  I saw him stop and think.  Had I hit a note? Finally he replied. "How about we have an Indian takeaway one night".  Indian takeaway!  I had more in mind a sneaky late sunny week in India.  Alright maybe not India. How about Lanzarote?  Sadly not to be.  The truth of it is that we need to start saving now if we want to have a summer holiday next year. 

Still, maybe a curry was the very thing to cheer me up.  I had a glut of peppers in the fridge so I knocked up a Chicken Jalfrezi and I really had forgotten how quick and easy making a good curry is.  It was fresh, aromatic, spicy and vibrant.  So much better that anything you are going to get in your average Indian restaurant.  "God that was good", exclaimed Hugh, "We certainly won't be getting any takeaways anymore".  Great! So now I don't even have that to look forwards to.


Chicken Jalfrezi 

2 tablespoons ghee or vegetable oil
2 onions, finely chopped

4 Red peppers, seeds removed and sliced
2 Fresh Green Finger Chillis, thinly sliced (more if you want)
6 cloves garlic, very finely chopped

4 Breasts of  free-range or organic chicken breast, cut into 1" chunks
1 teaspoons ground turmeric

3 teaspoons ground cumin 
1 teaspoons ground coriander 
1 large knob of fresh ginger, grated
Handful of green Cardamon Seeds, crushed, seeds removed and then roughly ground
Salt
Freshly ground black pepper
1 (400g) tin whole plum tomatoes, roughly chopped 

Small bunch of freshly chopped coriander

Heat the ghee or oil in a large heavy bottomed saucepan over medium-high heat. Add the chicken which has been seasoned with salt and plenty of freshly ground black pepper.  Fry, until golden brown on all sides.  Remove with a slotted spoon and add the onions to the pan. Cook for about 5 minutes until they begin to soften and then add the peppers. Cook for a further 10 minutes or so.  Next add the garlic and ginger.  Stir well and then add your spices apart from the cardamon. Fry for a few minutes more and add the chicken back.  Next add the tinned tomatoes and some salt to taste.  Allow to cook uncovered for about 20 minutes.  The idea is to thicken the sauce, cook the chicken through and allow the spices to mellow and  integrate.  It doesn't need hours on the stove.  Once the spices have lost their harshness and become melodious, add the cardamon and fresh coriander.  Cook for a few minutes more.  Serve with plenty of steaming basmati rice.


Saturday, 16 July 2011

Indian Summer


My Mum was a really adventurous cook.  Our shelves were full of cookbooks by Robert Carrier and Elizabeth David.  My parents ate out and travelled and I was very fortunate in partaking and experiencing an exciting time in the 70's when people where embrassing a tremendous change in food and restaurants.  

My Mother experimented with many things but I distinctly remember a momentous moment, when what seemed like a huge bowl was placed in the larder, full of Chicken in a Tandoori Marinade.  I thought this the height of sophistication and excitement, which may give you a small clue where my future interests were going to lie.  Anyway, I can't remember the outcome but 30 years later I suddenly have a fascination with recreating this dish again.  What better than chicken, marinated with loads of Indian spices, spicy and vibrant but with none of that horrific red food colouring which has so maligned the dish today. 

But what to serve it with?  I can't remember where I first heard of Kushcumber Salad but today, the weather against all odds being July, was actually hot at times.  I  jumped at the chance, lit the barbecue, chucked on the Tandoori chicken and this refreshing, spicy salad seemed just the perfect accompaniment.  That and a dollop of Raita to cut the heat.  Closest I will ever get to an Indian Summer.

I love exploring local Indian shops and hunting out spices and herbs and all sorts of exotic ingredients but if you are having any difficulty getting hold of ingredients for these recipes, try Seasoned Pioneers.


Tandoori Chicken

1 kg chicken, legs are best (Free-range and Organic if possible)
1/2 cup plain yogurt
2 tablespoons fresh lemon juice
1 tablespoon minced garlic
1 tablespoon peeled and grated ginger root
1 tablespoon ground cumin
1 teaspoon ground coriander
1/2 teaspoon cayenne pepper
1 teaspoon ground cardamom
1/2 teaspoon ground cloves
1/2 teaspoon fresh-ground black pepper
2 teaspoons salt, or to taste

Skin Chicken and trim all visible fat.  Cut into drumsticks and thighs. Prick the flesh of the chicken all over with a fork. Then, using a sharp knife, cut slashes in the flesh to allow the marinade to penetrate. Place the chicken in a nonreactive large, shallow dish.

Combine the lemon juice, garlic, ginger, cumin, ground coriander, cayenne pepper, cardamom, cloves and black pepper. Stir until well-mixed, then pour the mixture over the chicken and rub it into the flesh, turning the chicken several times.  Leave for 2 hours, then add the yogurt.  Mix really well. Cover and refrigerate 8 hours or overnight. (Do not marinate for longer than 2 days.) Remove the chicken from the refrigerator at least 30 minutes before cooking.  Season well with salt.

The chicken may be grilled or roasted. If using a charcoal grill, prepare a fire for direct-heat cooking. Allow the coals to burn until white ash covers them and the heat is moderate.

Remove the chicken from the marinade, pressing lightly to extract excess marinade, and brush with oil. Place the chicken pieces on grill turning often until cooked.


Kachumber Salad

1 small red onion, very thinly sliced or a bunch of spring onions, very finely chopped
1 cucumber

1 fresh red chilli, very finely chopped
4 large tomatoes or a handful of cherry tomatoes, chopped
1 tsp roasted cumin powder

Juice of 1 lemon
Olive oil or Onion Oil
Salt to taste
Handful of fresh coriander, finely chopped
Nigella Seeds

Take your cucumber and cut in half lengthways, remove seeds with a spoon, half again lengthways and then cut into quarter moons.

Add all the rest of the vegetables together. Make a dressing by mixing the lemon juice with the oil.  Season well with salt and mix together with all the rest of the vegetables and coriander.  Do a taste test to see if the seasoning is right for you. Sprinkle with Nigella Seeds.

Monday, 11 July 2011

Monsoon Madness


It was pouring this morning. Another English Summer July day.  It was like a Monsoon.  Maybe that is why I got the strongest craving for a curry.  And not just any curry, but it had to be an Aubergine curry.  I am not sure why.  In fact I am not sure that I have ever even eaten an Aubergine Curry before, or Brinjal Bhaji as it is more authentically known, but I knew that I wanted to.  This recipe has Tamarind in it which gives it a delicious sour flavour with combines brilliantly with the sweetness and richness of the Aubergine. 

Tamarind is easy to get hold of from most Indian shops but if you are having any problems getting hold of any spices, then I really recommend Seasoned Pioneers. They have such a fantastic selection of seasonings from all over the world and will send them out to you anywhere in Europe, for very little postage. All their spices come in sealable foil bags and although I am usually the sort to mix up my own spice blends, I was so excited by their range that along with Chipolte Chilli, which I have been searching for forever, I have ordered a few, ready mixed blends and I will be letting you know how I get on in the very near future.


Aubergines are at their best just now, shiny and fat and delicious.  There is something slightly dark and mysterious about them.  Native to India, they turn up in dishes from all over the world and work particularly well when char-grilled, either sliced or whole, as they absorb the smoky flavours, which gives dishes such as Moutabal its fantastic flavour.  Aubergines also feature in Japanese recipes, such as Aubergines Baked with Miso and the little baby ones known as pea aubergines are a main feature of Thai Curries.

They are notorious, however, for soaking up oil and I almost wrote them off at one stage, as I was so concerned how fattening they might be.  All the recipes that I was cooking seemed to require frying. Dishes such as Ratatouille or a number of Italian dishes which require them to be cooked "al Funghetto" or "in the style of mushrooms", i.e. fried in loads of olive oil.  It is only when I discovered that there was another way, that I came to love the aubergine again.


Simply cut your aubergine into large chunks (about 1" squared) and toss them in a little olive oil, salt and pepper and lay out on flat trays, with plenty of room between pieces and roast in a medium/hot oven until golden brown, crisp on the outside, melting soft on the inside and delicious. So now this is how I make Ratatouille or Imam Bayeldi or Capanata.  And for Melanzane Parmigiana and Moussaka which used to involve flouring and frying the Aubergine slices in loads of olive oil,now I just brush them with oil and char-grill them instead.  All the flavour, half the fat!  Got to be a good thing.

Brinjal Bhaji (Aubergine Curry)


4 Aubergines
2 tsp of Ground Coriander
1/2 tsp Ground Turmeric
Small handful of Curry leaves
2 tsp Mustard Seeds
3 tsp Ground Cumin
1 tsp Fenugreek Seeds
1 large onion, finely chopped
5 cloves of Garlic, peeled and very finely chopped
2" Fresh Ginger,peeled and very finely chopped or grated 
1 Fresh red Chilli, very finely chopped
1 tin of whole plum tomatoes (400g)
1 tin chickpeas, drained
20 g of tamarind paste or pulp
1 bunch of Fresh chopped corriander
Oil
Salt
Yoghurt to serve


Chop up your aubergine into 1" chunks and toss with a little oil, some salt and some freshly ground black pepper.  Spread out on some baking trays with plenty of room and roast in a medium/hot oven until golden brown all over.


Take a Wok or large heavy bottomed saucepan and heat with some oil.  Add mustard seeds. When they start to pop add the cumin, ground coriander and turmeric, fenugreek and curry leaves. Then add chopped onions, ginger, garlic and chilli.  Fry on medium flame until really soft.  Add the tomatoes and break up untill really mixed through.  Add the aubergines and a little salt to taste. Then add tamarind.  (If using pulp soak for 15 minutes in boiling hot water.   Then strain to remove the seeds.)   Add the chickpeas.


Cover with a lid and cook on low heat for about 20 minutes to allow the flavours to combine and mellow. Finally add the freshly chopped corriander and serve with freshly cooked basmati rice.  Add a dollop of yoghurt if you like.

Wednesday, 16 February 2011

Some Indian influenced Jewels


I have two quite special recipes this week, as they are ones I have been perfecting over a few months and I think they are both fairly unique.  The first is Roast Chicken which is first smothered with lime pickle.  The chicken and lime works really well together and with the Indian spices it is amazingly delicious.  You can make the lime pickle yourself or else buy some but make sure it is a good quality one.  The Indian spices are also fantastic with the accompanying roast vegetables.  I think it is just such a great use of a store cupboard staple.

You can also try substituting the lime pickle for Harissa to make "Harissa Chicken".  Again, you can make your own Harissa (recipe below) or Belazu make a particularly good one with real Rose Petals.  With both these recipes, I don't marinade the chicken for long.  This way, it is not too spicy for the kids, but I make a really kicking gravy for the adults, so every one is happy.  If, however, you do not have kids to feed, you could try marinating the chicken overnight, before roasting. 


Next a recipe for Saffron Rice with Roast Cauliflower and Crispy Fried Onions.  This is a sort of mix-up of lots of different things.  The Saffron Rice is originally a Persian or Iranian dish and served hot but I wanted to make more of a salad. I have added some green lentils and toasted cauliflower and it is delicious served at room temperature and a great accompaniment to the chicken.  The crispy onions on top are so easy and can be used in many different recipes.  Whilst making them, you get a delicious onion flavoured oil, which is great for seasoning not only this recipe but lots of different salads.  If your onions go soggy you can just crisp them up again in the oven but make sure you do not burn them!


Roast Chicken with Lime Pickle

Take you chicken out of the fridge a while before you roast it to allow it to come up to room temperature.  Only buy Free Range Chicken, if you can afford it.  It really is worth the extra money!  Remove any trussing.  Smother the chicken in Lime Pickle and season with salt and freshly ground black pepper.  Turn up side down (breast side down) and place on a roasting tray in a hot oven at 180°C.  Roast for 20 minutes before turning the right way up and returning to the oven for a further 30 to 40 minutes until golden brown.  Check to see if the chicken is cooked regularly after 45 minutes total cooking time.  Insert a skewer into the thickest bit of the leg, closest to the breast, and the juices should run clear.  When cooked, remove the chicken to a plate large enough to catch the juices and cover with tin foil.  Place the roasting tray on the hob over a medium flame.  Add a good glug of white wine and scrape up all the gunky bits stuck to the bottom of the pan.  Add a good few tablespoons of Lime Pickle and taste for seasoning.  The gravy should have a punchy kick.  Add any further juices escaped from the chicken and serve. (The cooking times are for a fairly large, family sized chicken.  Adjust the cooking times accordingly.)
Harissa can be used to substitute the lime pickle on the chicken in exactly the same way and then also stirred into the gravy.  I will give you a fantastic recipe for "Roast Winter Vegetable Cous Cous" very soon, which is delicious with this version of the Chicken.   


Harissa Sauce

Put some roughly chopped red onion and some peeled cloves of garlic in an oven proof dish. Sprinkle generously with cumin and olive oil, salt and pepper. Cover and roast in a medium oven until soft. Char-grill some red peppers and whole red chillis until blackened all over. Place in a bowl covered with cling film and leave to cool. Remove the skin and seeds. Whiz up all ingredients in a food processor with some olive oil, a preserved lemon or two and a bunch of coriander, until smooth.


Saffron Basmati Rice with Saffron, Roasted Cauliflower and Crispy Fried Onions


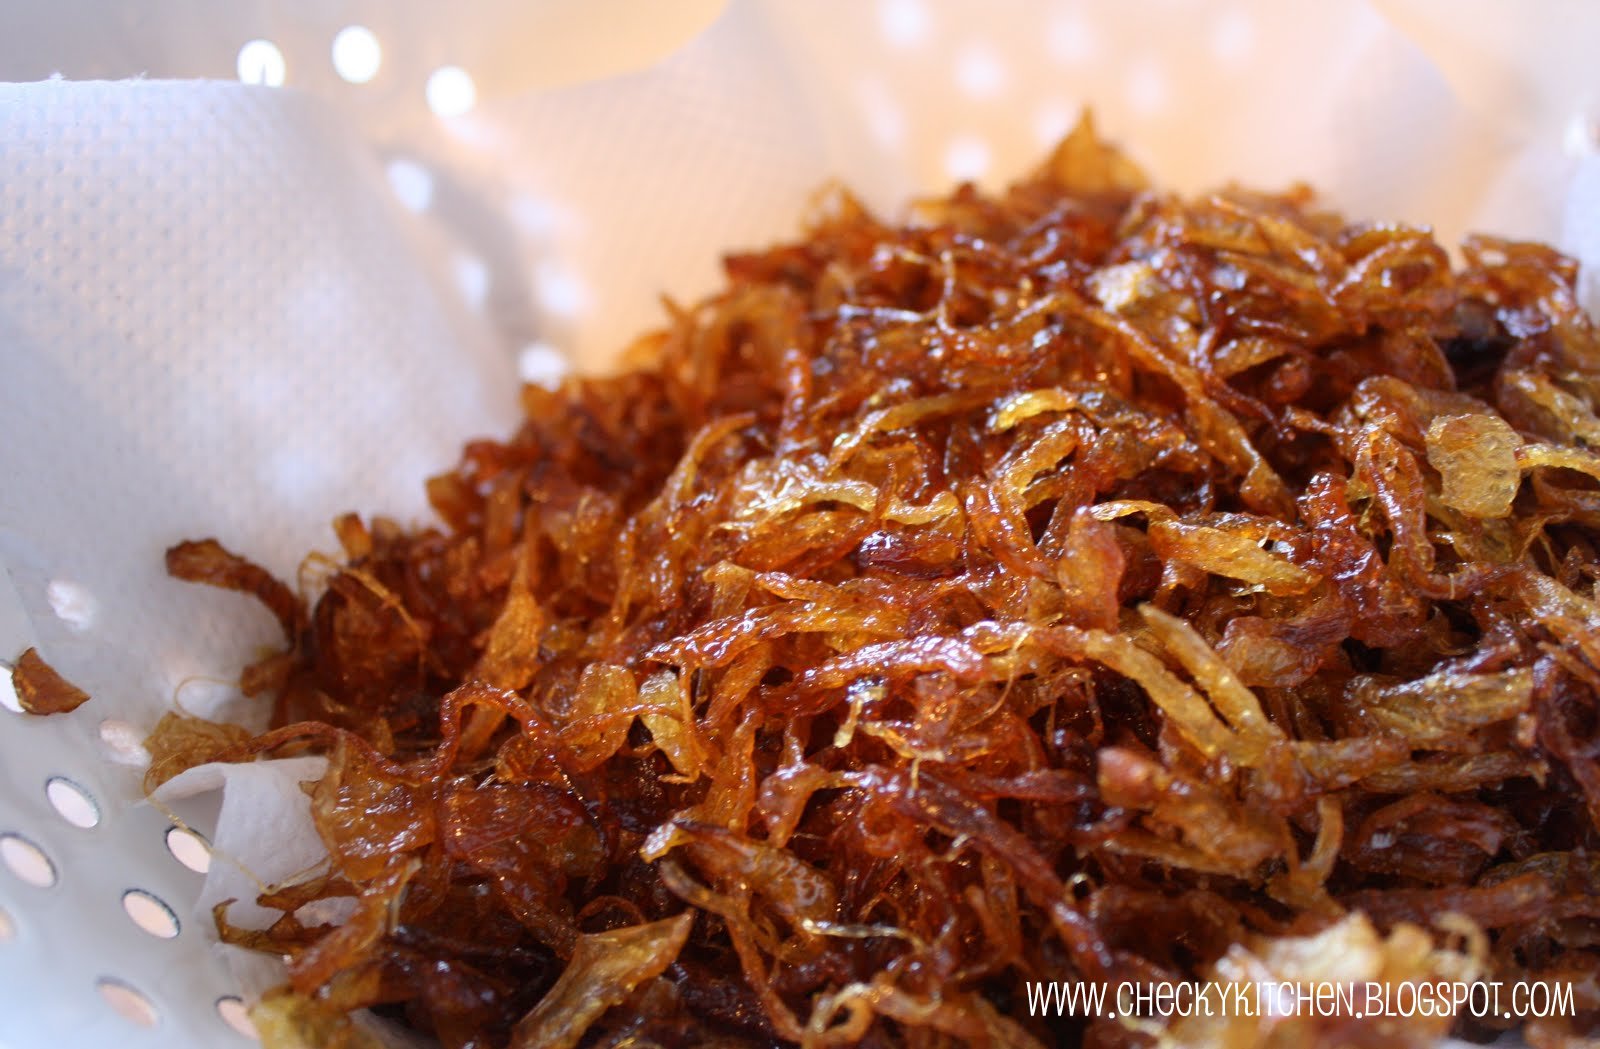
Crispy Fried Onions
Thinly slice a few large onions. Place in a saucepan and add vegetable oil to about half way to the top of the onions.  You don't want to use too much oil as the more intense the flavour the better.  The onions will cook down a huge amount.  Place on a medium heat and cook carefully until they have sunk below the surface of the oil.  Turn up the heat and deep fry until golden brown. Be careful not to burn, stirring regularly, especially in the corners where the onions will cook most quickly. Drain immediately and break up any clumps.  Scatter onto some kitchen paper and leave to crisp up. Season lightly with salt. When cool pour the oil into a bottle for further use.
Meanwhile cook some basmati rice with salt and a generous pinch of saffron. Again, don't use too much water as you don't want to dilute the saffron too much. The rice should be a beautiful, deep orange colour.  When cooked, drain and refresh in cold water.  This is a salad and it is important that the rice is fluffy and separated.  Allow to drain again for at least an hour, if not more. Cook some Green Lentils very gently in plenty of water for about 15-20 minutes until tender.  You want them to still have a little bite and texture.  Drain for at least half and hour.  Next roast your cauliflower. Cut it into even size florets and make sure it is completely dry by patting it in between paper towels. Toss the florets with a good glug of olive oil, some salt, some freshly ground black pepper, a few teaspoons of cumin and some hot chilli powder or cayenne. Mix well and lay out in a single layer in a roasting pan. Roast in the middle of the oven at 200°C (400°F) for 20 minutes, then give them a good toss to ensure even cooking.  Roast for 10 minutes more or until the edges are brown and crunchy.  In a bowl mix the rice with some of the onion oil, plenty of salt and freshly ground black pepper.  Immediately you will taste the great combination of saffron and subtle onion flavours. You can add some finely chopped coriander if you like.  Add the lentils and cauliflower and check for seasoning. Pile onto a serving plate and heap crispy onions on top.
Really Lovely Roast Vegetables to serve with your Chicken
Choose from Carrots, Parsnip, Fennel, Celeriac, Swede, Butternut Squash and Pumpkin.
Cut up your vegetables into large chunky, bite size pieces.  Carrots, Fennel and Parsnips should be cut into even sized wedges, lengthways through the root. Toss with good olive oil, salt and pepper and lay out on roasting trays.  Each vegetable should be on a separate tray with plenty of room between each piece, to allow even cooking.  Roast until golden in a hot oven at 180 -200°C.  Only mix together when cooked.  Add chopped herbs if you like.